
aroma rice cooker instructions manual
Aroma Rice Cooker Instructions Manual: A Comprehensive Guide
Welcome! This comprehensive guide details using your Aroma rice cooker, including pre-programmed settings and accessories. It offers measurement charts for rice and steaming, ensuring perfect results every time.
This manual is designed for both home and commercial use, providing detailed instructions for a variety of culinary applications.
Understanding Your Aroma Rice Cooker
Your Aroma rice cooker is engineered to simplify the process of cooking rice and other grains to perfection. It operates on a straightforward principle: boiling water to cook the rice, then automatically switching to a warming mode once all the water is absorbed. The cooker’s sensor detects the temperature rise above boiling point, signaling completion.
This appliance isn’t limited to just rice; it can also gently cook ingredients like chicken alongside the rice, provided the pieces aren’t excessively large, essentially boiling them together. The included clear measuring cup is specifically calibrated for accurate rice measurement, ensuring optimal water-to-rice ratios. Remember to rinse the rice 2-3 times before cooking to remove excess starch.
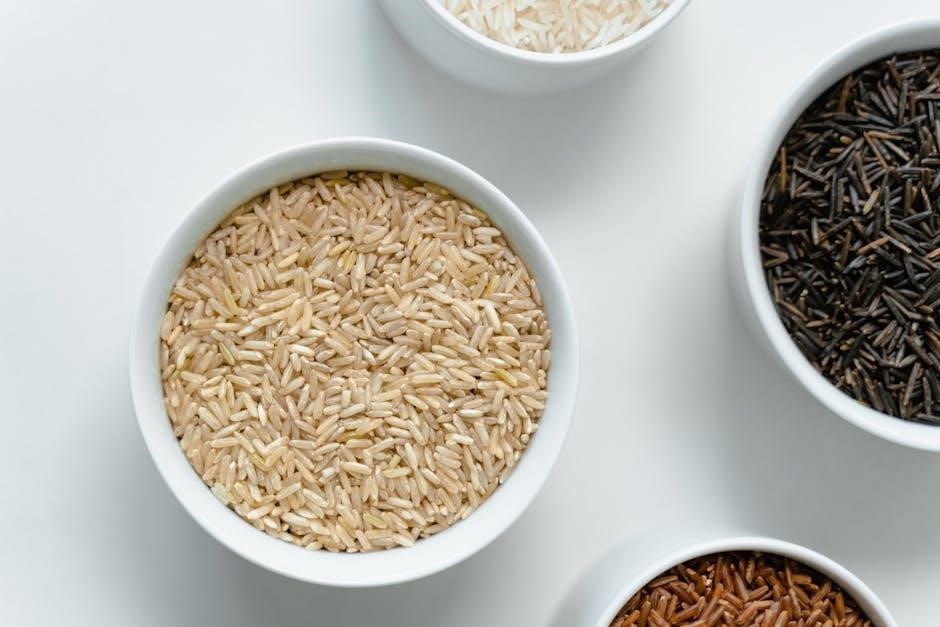
The digital pre-programmed settings offer convenience for various grain types, like white and brown rice, and even a ‘Quick Rice’ option for faster meal preparation. Beyond basic cooking, the steam function allows for simultaneous vegetable preparation. Understanding these core functionalities unlocks the full potential of your Aroma rice cooker, delivering consistently delicious results.
Components and Accessories Included
Your Aroma rice cooker package includes several essential components designed to enhance your cooking experience. A key accessory is the clear measuring cup, specifically designed for accurate rice portioning – crucial for achieving the perfect texture. This cup’s markings correspond to the cooker’s internal measurements, differing from standard US cups.
Typically, a steam tray is included, enabling simultaneous cooking of vegetables or other side dishes while the rice cooks below. The rice paddle, often made of plastic, is designed to gently fluff the rice without damaging the non-stick coating of the inner pot. The inner pot itself is usually removable for easy cleaning.
Furthermore, the manual itself is a vital component, containing detailed instructions, cooking charts, and troubleshooting tips. Some models may include additional accessories like condensation collection cups. Familiarizing yourself with each component ensures proper usage and maximizes the versatility of your Aroma rice cooker.
Initial Setup and Preparation
Before your first use, it’s essential to properly set up and prepare your Aroma rice cooker. Begin by removing all packaging materials and thoroughly cleaning the inner pot, steam tray, and measuring cup with warm, soapy water. Rinse all components completely and dry them before use.
Place the rice cooker on a stable, level surface away from water sources. Ensure there is adequate ventilation around the cooker during operation. It’s recommended to perform a test run with a small amount of water to familiarize yourself with the cooker’s operation and eliminate any potential manufacturing odors.
Familiarize yourself with the control panel and the function of each button. Refer to the included manual for a detailed explanation of each setting. Understanding these initial steps will ensure a smooth and enjoyable cooking experience with your new Aroma rice cooker.
Cooking Perfect Rice
Achieving fluffy, delicious rice hinges on mastering the fundamentals. Precise rice-to-water ratios and proper rinsing are key. This section guides you through each step for consistently perfect results!
Rice to Water Ratio: The Foundation of Success
Understanding the ideal rice-to-water ratio is paramount for achieving perfectly cooked rice. Different rice varieties require varying amounts of water. For standard white rice, a common starting point is a 1:1 ratio – one cup of rice to one cup of water. However, adjustments are often necessary.
If you desire firmer, more separated grains, similar to those served in Chinese restaurants, consider a slightly reduced ratio, such as 1:0.9 or even 1:0.8. Conversely, for stickier rice, like Japanese sushi rice, a 1:1.2 ratio is often preferred. Remember, sushi rice is naturally wetter and benefits from resting in the pot post-cooking.
The included clear measuring cup is crucial for accuracy; it’s not equivalent to a standard US cup. Always use the provided cup for consistent results. Experimentation is encouraged! Begin with the recommended ratio for your rice type and adjust slightly in subsequent batches until you achieve your desired texture. Consider the grain length – short and medium grains generally require more water than long-grain varieties.
Rinsing Rice: Why and How
Rinsing rice before cooking is a crucial step often overlooked, yet it significantly impacts the final texture. The primary purpose is to remove excess starch from the surface of the grains. This starch, if left unrinsed, can lead to sticky, gummy rice, especially with short and medium-grain varieties.
To rinse effectively, place the measured rice into the inner pot of your Aroma cooker. Add cold water and gently swirl the rice with your hand. The water will become cloudy – this is the released starch. Drain the cloudy water completely. Repeat this process 2-3 times, or until the water runs relatively clear.
While rinsing is generally recommended, some argue that it removes valuable nutrients. However, the textural benefits usually outweigh this concern. For sushi rice, thorough rinsing is particularly important to achieve the desired stickiness without excessive gumminess. Remember to always rinse before adding water for cooking, following the recommended rice-to-water ratio.
White Rice Cooking Instructions
Cooking perfect white rice in your Aroma cooker is straightforward! Begin by using the provided measuring cup – note that this cup differs from standard US cups. For most white rice varieties, a 1:1 rice-to-water ratio generally yields excellent results, though adjustments may be needed based on preference.
After rinsing the rice (recommended – see previous section), add the rice and water to the inner pot. Ensure the water level aligns with the corresponding cup marking inside the pot. Secure the lid, ensuring a proper seal. Press the “White Rice” button. The cooker will automatically switch to “Warm” mode once cooking is complete.
Allow the rice to stand in “Warm” mode for 10-15 minutes before fluffing with a fork. This resting period allows the steam to redistribute, resulting in evenly cooked, fluffy rice. If the rice appears too wet, reduce the water slightly in future batches. If it’s too dry, increase the water incrementally.

Utilizing Pre-Programmed Settings
Explore convenience! Your Aroma cooker features pre-set programs for white, brown, and quick rice, plus a steam function. These settings simplify cooking various grains and dishes;
Brown Rice Setting: A Detailed Guide
Mastering Brown Rice: The brown rice setting on your Aroma cooker is designed to perfectly cook this nutritious and fiber-rich grain. Unlike white rice, brown rice requires a longer cooking time and more water due to its bran layer.
Ratio and Preparation: Typically, a 1:2.25 rice-to-water ratio is recommended for optimal results. For example, use 1 cup of brown rice with 2.25 cups of water. Always rinse the brown rice thoroughly under cold water 2-3 times before cooking to remove excess starch. This helps prevent stickiness and improves the texture.
Cooking Process: After rinsing, add the rice and water to the inner pot. Secure the lid and select the “Brown Rice” setting. The cooker will automatically adjust the cooking time and temperature. Once the cycle is complete, allow the rice to steam for 10-15 minutes with the lid closed. This final steaming period ensures even cooking and a fluffy texture.
Tips for Success: For softer brown rice, you can slightly increase the water ratio. Experiment to find your preferred consistency. Remember that brown rice cooking times can vary slightly depending on the age and variety of the rice.
Quick Rice Setting: For Faster Meals
Speed and Convenience: The “Quick Rice” setting on your Aroma rice cooker is ideal when you need perfectly cooked rice in a hurry. This setting utilizes increased heat and a shorter cooking cycle to deliver fluffy rice in significantly less time than traditional methods. It’s perfect for busy weeknights or when unexpected guests arrive!
Water Ratio is Key: For the Quick Rice setting, a 1:1 rice-to-water ratio is generally recommended. This means using equal parts rice and water. As with all rice types, rinsing the rice beforehand is crucial for removing excess starch and achieving optimal texture. Rinse 2-3 times until the water runs clear.
Operation and Completion: Add the rinsed rice and water to the inner pot, secure the lid, and select the “Quick Rice” function. The cooker will automatically handle the rest. Once the cycle finishes, let the rice stand, covered, for 5-10 minutes to allow the steam to redistribute, resulting in evenly cooked, fluffy rice.
Best Rice Varieties: This setting works exceptionally well with white rice, particularly jasmine or long-grain varieties, for a firmer, more separated grain.
Steam Function: Cooking Vegetables and More

Versatile Steaming: Your Aroma rice cooker isn’t limited to just rice! The built-in steam function allows you to prepare a wide variety of foods, from fresh vegetables and delicate fish to savory dumplings and more. Steaming preserves nutrients and natural flavors, offering a healthy and delicious cooking alternative.
Utilizing the Steaming Basket: To steam, add approximately one cup of water to the inner pot. Place the included steaming basket inside, ensuring it’s securely positioned above the water level. Arrange your food items in a single layer within the basket, avoiding overcrowding for even cooking.
Operation and Timing: Secure the lid and select the “Steam” function. Cooking times will vary depending on the food being steamed. Generally, vegetables require 10-15 minutes, while fish may take 15-20 minutes. Check for doneness periodically.
Flavor Enhancements: For added flavor, consider adding herbs, spices, or a splash of broth to the water in the inner pot. This infuses the steam with aromatic goodness, enhancing the taste of your steamed dishes.

Beyond Basic Rice: Expanding Your Culinary Options
Unlock versatility! Explore ghee rice, flavorful spice infusions, and diverse grains like quinoa and barley. Your Aroma cooker adapts to many recipes, enhancing your meals.
Cooking Ghee Rice in Your Aroma Cooker
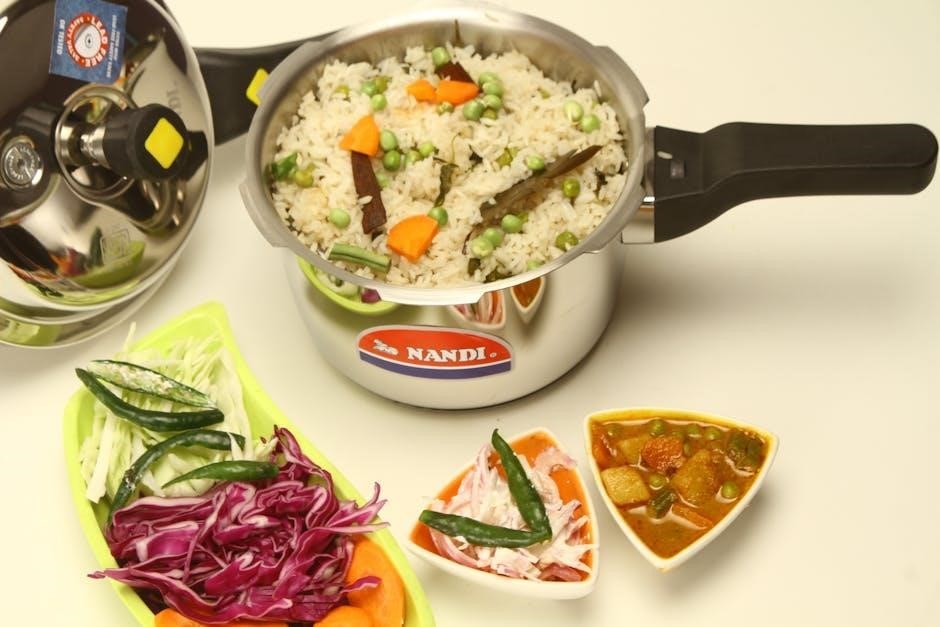
Ghee rice, a fragrant one-pot dish, is easily achievable with your Aroma rice cooker. Begin by melting approximately 2-3 tablespoons of ghee directly in the inner pot. Gently sauté whole spices – typically cumin seeds, cloves, cardamom pods, and a bay leaf – in the melted ghee until fragrant, usually around 30-60 seconds.
Add your measured rice (basmati is traditional) – typically 2 cups – and lightly toast it in the ghee for another minute. This step enhances the rice’s flavor and texture. Then, add water, usually in a 1:1 ratio with the rice, or slightly more for a softer texture. Season with salt to taste.
Secure the lid and select the ‘White Rice’ setting on your Aroma cooker. Once the cooking cycle is complete, let the ghee rice rest, covered, for 10-15 minutes. This allows the steam to redistribute, resulting in fluffy, flavorful grains. Before serving, gently fluff with a fork and garnish with chopped nuts like cashews or almonds for added texture and richness. Enjoy this delightful accompaniment to curries or as a standalone dish!
Adding Flavor: Spices and Seasonings
Elevate your rice beyond the ordinary by incorporating spices and seasonings directly into the cooking process! For aromatic results, sauté spices like cumin seeds, cardamom, cloves, or cinnamon sticks in ghee or oil within the inner pot before adding the rice and water. This blooms the flavors, infusing the entire dish.

Experiment with different spice blends – garam masala, curry powder, or even a simple pinch of turmeric can transform your rice. Beyond spices, consider adding fresh herbs like cilantro or parsley after cooking for a vibrant finish.
Seasonings like salt are essential, but don’t be afraid to explore other options. A bay leaf added during cooking imparts a subtle depth, while a squeeze of lemon juice post-cooking brightens the flavors. For a savory twist, try a dash of soy sauce or a sprinkle of nutritional yeast. Remember to adjust quantities to your preference, starting small and tasting as you go!
Cooking Other Grains: Quinoa, Barley, and More
Expand your culinary horizons beyond rice! Your Aroma cooker isn’t limited to just one grain; it’s versatile enough to cook quinoa, barley, oats, and other grains with excellent results. However, adjustments to the water ratio and cooking time are crucial for optimal texture.

For quinoa, a 1:2 grain-to-water ratio (one cup quinoa to two cups water) and the “White Rice” setting generally work well. Barley typically requires a 1:2.5 ratio and may benefit from the “Brown Rice” setting due to its longer cooking time. Oats can be cooked using the “Quick Rice” setting with a 1:1.5 ratio.
Always rinse grains before cooking to remove any bitterness. Monitor the cooking process, especially when trying a new grain, and adjust the water ratio slightly if needed. Experimentation is key to finding the perfect settings for your preferred grains and achieving consistently fluffy, delicious results!

Maintenance and Safety
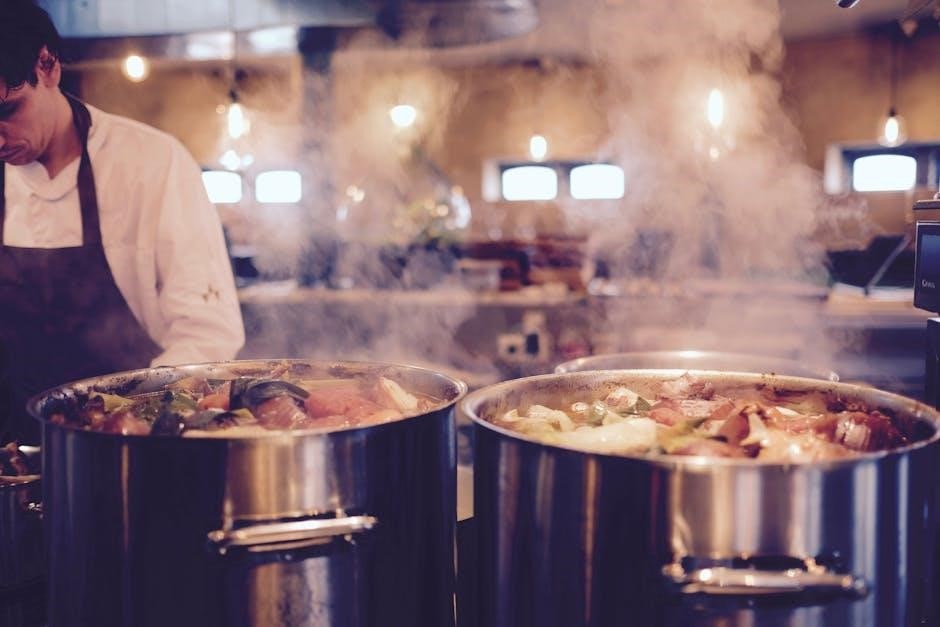
Ensure longevity and safe operation by following cleaning guidelines and safety precautions. Never clean a hot cooker, and remember this appliance is designed for commercial use.
Cleaning Your Aroma Rice Cooker
Regular cleaning is crucial for maintaining your Aroma rice cooker’s performance and hygiene. Always unplug the cooker and allow it to cool completely before beginning any cleaning process. The inner pot is typically non-stick and can be washed with warm, soapy water, or placed in the dishwasher if indicated in your model’s specific instructions.
The steam vent and lid should also be cleaned after each use to prevent buildup. These parts can usually be removed for easier cleaning. Wipe down the exterior of the cooker with a damp cloth. Avoid using abrasive cleaners, as they can damage the finish.
For stubborn food residue, a paste of baking soda and water can be effective. Ensure all components are thoroughly dried before reassembling the cooker. Never immerse the cooker base in water or any other liquid, as this could cause electrical damage. Proper cleaning extends the life of your appliance and ensures optimal cooking results.
Safety Precautions and Warnings
Prioritize safety when operating your Aroma rice cooker. Never clean the appliance while it’s still hot to avoid burns. This appliance is designed for household use only; specific models are noted for commercial applications, but always adhere to guidelines.
Ensure the cooker is placed on a stable, heat-resistant surface away from flammable materials. Do not operate the cooker with a damaged cord or plug, and avoid using extension cords. Keep the cooker out of reach of children.
Do not attempt to repair the cooker yourself; contact qualified service personnel for any repairs. Avoid touching hot surfaces, and always use oven mitts when handling the inner pot or steam vent. Be cautious of steam release during and after cooking. Always unplug the cooker when not in use and before cleaning. Following these precautions ensures safe and reliable operation.
Troubleshooting Common Issues
Rice is too wet: Ensure accurate rice-to-water ratios are followed. If using sushi rice, a slightly wetter consistency is normal, but allowing it to sit in the pot after cooking can resolve this. Consider using long-grain jasmine rice for firmer results.
Rice is burnt: Reduce the water amount slightly for the next attempt. Ensure the inner pot is clean and free of residue. Check that the heating element is functioning correctly.
Cooker won’t turn on: Verify the power cord is securely plugged in and the outlet is working. Check the cooker’s lid is properly sealed. If issues persist, contact customer support.
Chicken isn’t cooked: Ensure chicken pieces are not excessively large, allowing them to boil alongside the rice. Adjust cooking time if necessary. Remember the cooker functions by boiling, reaching 100°C/212°F.